Learn how to adjust the height of the string of your electric guitar in different types of bridges, in order to be able to play more easily.
After Setting the Truss Rod, the next step may be to Adjust the STRINGS HEIGHT. This height can be changed from the bridge saddles, and always after slightly loosening the strings.
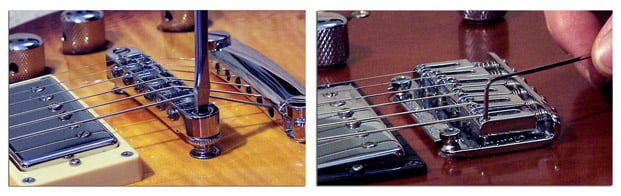
To Adjust the String Height on the Tune-o-matic bridge model like that of Les Paul style guitars, it should be done in block (image below left). While Stratocaster-style or floating bridges are individually adjustable (right image).
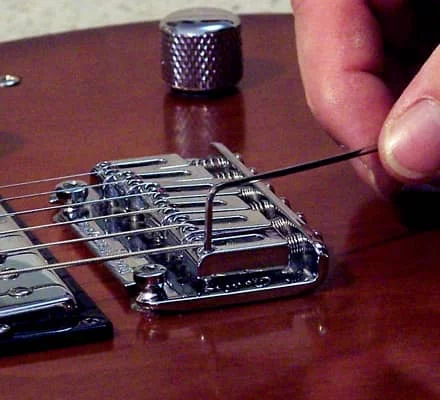
The Telecasters Vintage-style bridge would adjust the height of the strings in pairs.

On Telecasters with upgraded bridges this would be adjusted individually. In this way, a more precise adjustment can be achieved.
Adjust the String Height on an Guitar: Indicative Measures
An optimal string height setting would be between 2 millimeters and 2.5 mm, from the bottom of the sixth string to the top of the 12th fret. We can go down slightly of that height in the direction of the thin strings, and always following the curvature of the frets.

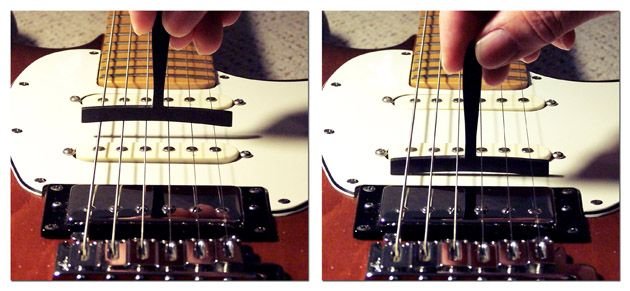
You can Download the HOME RULE to be able to make the measurements with total precision.
Adjust the String Height of your Guitar With the Downloadable Rule
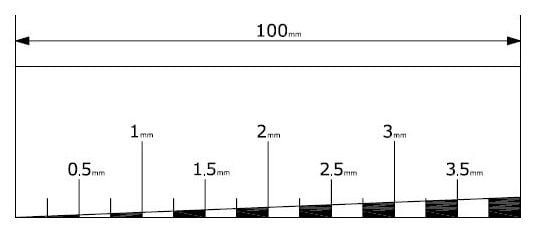
Each guitar requires its own setup as seen in the images above, although the differences are virtually imperceptible. The one on the left will be about 2.1 mm, and the one on the right will be about 2.4 mm, since the half-millimeter line is about to appear.
This would be a very versatile setting that will give us a guitar that is comfortable to play, with good volume and tone, with which we can make chords sound good, and with ease to play solos.
If the guitar allows us to lower the strings by less than 2 mm without fret buzz we can gain playing speed, but we can lose tonal quality and volume. And if we turn them up to 3mm, we will gain volume and we will be able to strum with force, benefiting rhythm guitarists. But we would lose comfort and the necessary speed for a solo guitarist.
We should not obsess over measurements either, the main thing is that the instrument has a good tone.
How to Adjust Curvature of the Strings Relative to the Radius of the Fingerboard
To give the strings the same curvature as the fingerboard, we can use these templates that you have to print, and then transfer them to thick cardboard, sheet wood, or plastic. Download in PDF.
In the pdf file you have fingerboard radii from 7.25 inches to 20”.
Fingerboard Radius Templates
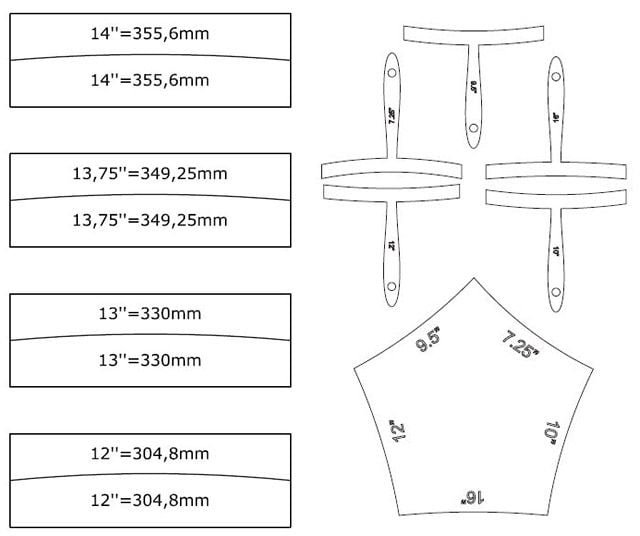
With these templates we can build a fingerboard radius gauge. This one in the image is made in PVC.
To achieve the same curvature of the strings with respect to the radius of the fingerboard in vintage-style Telecaster bridges, we will have to uneven the saddles of the outermost strings a bit, so that they take on curvature and are not staggered (image below). At this point, the single-saddle bridge would also be more accurate.
