Fret Crowning: Recovering the Comfort and Speed of Your Guitar. COMPLETE TUTORIAL so that you can Crown the Frets yourself. Sanding and Polishing the Frets, for OPTIMUM Performance.
With use and dirt, the strings of the Electric or Acoustic Guitar wear down the upper part of the frets, and they lose their original rounded shape, creating edges on both sides of the fret. These edges make it difficult for the fingertips to slide across the fretboard, and they also wear out the strings excessively.
To solve this problem, we would have to Crown the Frets, following the steps listed below.
First we would have to remove the guitar strings. We can do this operation more comfortably if we cut the strings. This way they will be able to go out with greater comfort, and on the other hand we will avoid possible chafing. Obviously it is always better to loosen the strings previously.
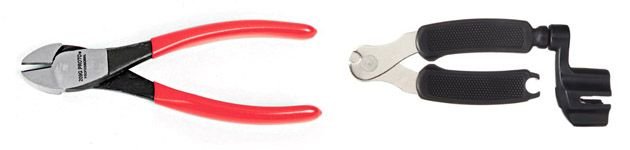
To cut the strings we can use cutting pliers, or a string cutter-coiler. A cheap and very useful tool that no guitarist should be without.
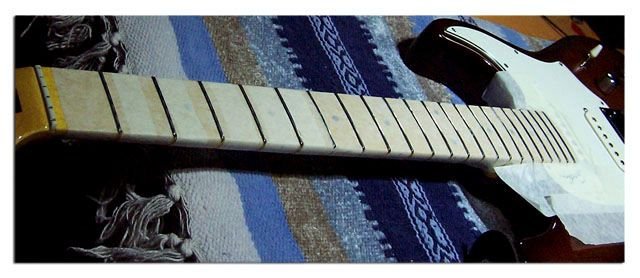
The next step to crown the frets would be to cover up the neck with masking tape to protect the wood from the sanding that we will have to apply to the frets.
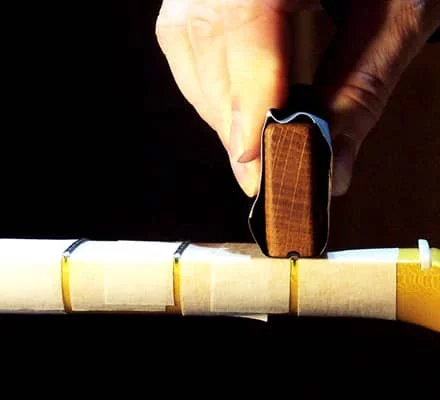
Fret Crowning Tool
After taping the wood and exposing the frets, we will have to apply 600 grit sandpaper with the tool we see in the image.
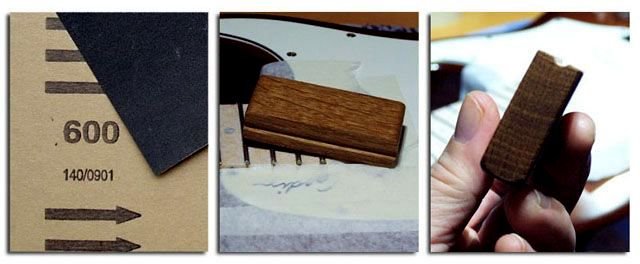
This tool is nothing more than a wooden block with a channel to insert the fret, and thus be able to sand it evenly. We would have to use this tool, always following the curvature of the fret, so as not to wear it down more in the center than on the sides.
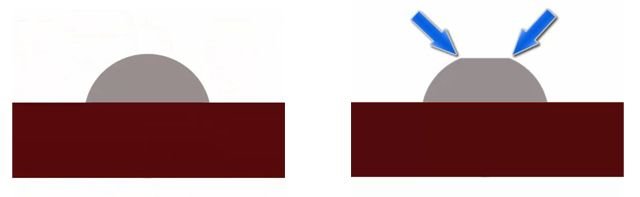
We can build one just like it with a wooden block with measurements approximate to those in the image below. Next we place the block marked with a line in the center, in a vice to hold it. We can use a cutter to remove a little wood in the marked part, to make a slight hole.
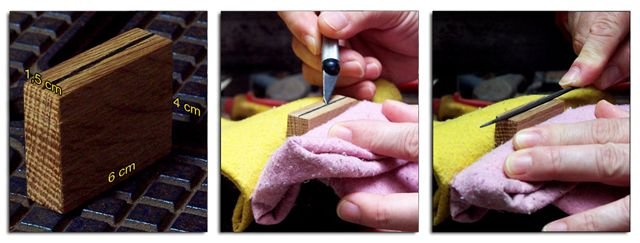
Once the channel has been made so that the 3 mm round file sits well on the wooden block, we only have to file. Then we would have to do checks on the fret, until the indentation is slightly deeper and wider than the fret.
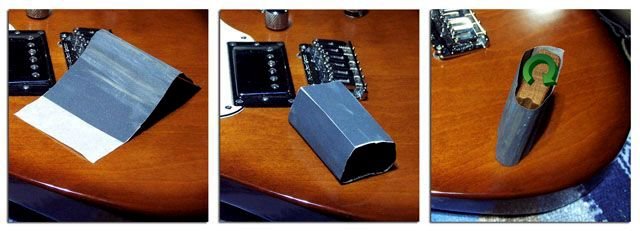
Place the Sandpaper on the Tool
Now we have to place a piece of 600 grit sandpaper joined by masking tape on the tool, to make a tube through which we will insert the tool. In this way we can rotate the sandpaper on the wooden block, as it wears out.
Once the tool is prepared, we have to moisten the sandpaper, wetting our finger a little to spread only a drop on the sandpaper. If we get it too wet, you can undo the masking tape placed on the neck, and end up sanding the fingerboard wood.
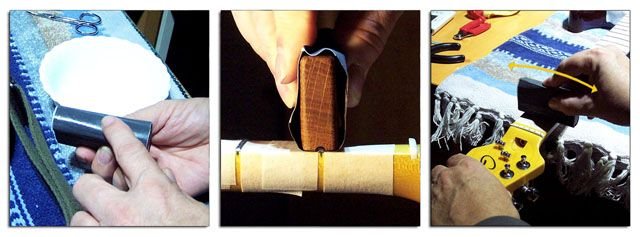
Now we just have to sand the frets back and forth following the curvature of the fret. We must always check the state of the sanding, for to wear the fret only as much as necessary, being careful not to break the masking tape on the neck. If the tape were to break, we would have to place a piece over the break to be able to continue sanding.
Once all the frets are crowned, we repeat the process but this time, with moistened 1000 grit sandpaper to smooth the fret.
Fret Crowning: Metal Polish
After Finishing Crowning, the last step would be to polish the frets with a cotton pad and some metal polish. We will finish the polishing with a dry cotton pad, to obtain a spectacular finish. Next we can remove the masking tape to place a new set of strings.
